Activate test
With this option you can switch on a test. The form recognition module creates a PDF file for each page showing you how the object in question is handed over to the OCR software. Positioning mistakes are easily traced this way.
It may happen that when the area in which the object to be recognized is is specified too small or too big, an object and with it the entire form is not properly recognized.
To execute a test switch on this option. Note that only one object can be tested at a time. Then, scan a few pages with form recognition turned on. Wait until the pages have been processed. After that you can open the generated PDF file in WebDMS and check whether the object has been positioned correctly.
 Example: In the following form the invoice number filed in field
 Title is wrong. It should be 196625 but we see in WebDMS that only the number 19662 appears.

When you look at the PDF file (you can do this by clicking the field Download at the end of each line), you see by the fine gray line (dyed red for illustration purposes) what the reason may be.
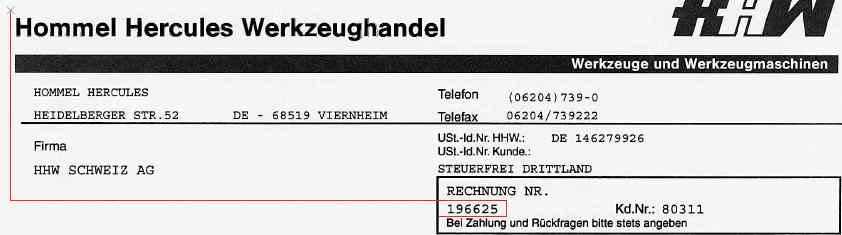
When you look at the frame around the invoice number, you find out that it is situated a bit too much to the left and that it includes the line which it adjoins. Such a line may prove to be a stumbling block for the text recognition software.